Welcome, Developer! 👋
Let’s build a simple map app from scratch. We’ll use Expo, TypeScript, and the excellent react-native-maps library. Our app will show a map of Manhattan, New York, with some mock Starbucks locations.
In this tutorial you’ll learn how to:
- Create a new Expo project
- Install and configure react-native-maps
- Add mock Starbucks data
- Show markers and callouts on the map
- Add a button to recenter the map on Manhattan
How does that sound? Let’s dive in!
Create a new Expo project
We’ll start fresh with Expo’s default TypeScript template:
npx create-expo-app@latestChoose a name (e.g., starbucks-manhattan-map) and select the default Expo template if prompted.
Then open the folder and start the dev server:
cd starbucks-manhattan-map
npm run start
This opens Expo Dev Tools, where you can run the app on iOS, Android, or Expo Go.
Install the Maps library
We’ll use the library react-native-maps to implement a map in our app. With Expo, you install it like this:
npx expo install react-native-mapsThat’s it for iOS. On Android, you may need a Google Maps API key to see map tiles. You can create one in the Google Cloud Console, enable the “Maps SDK for Android” and “Maps SDK for iOS” APIs, then add the key to your app.json:
{
  "expo": {
    "android": {
      "config": {
        "googleMaps": {
          "apiKey": "YOUR_ANDROID_GOOGLE_MAPS_API_KEY"
        }
      }
    }
  }
}
Expo has a good step-by-step guide on how to generate your Google Maps API key. It’s a simple step, developer!
Create mock Starbucks data
We’ll store our Starbucks locations in a separate file for clarity. Create a folder called data and then a file called shops.ts:
// data/shops.ts

export type CoffeeShop = {
  id: string;
  name: string;
  latitude: number;
  longitude: number;
};

export const SHOPS: CoffeeShop[] = [
  {
    id: "1",
    name: "Starbucks – Times Square",
    latitude: 40.758,
    longitude: -73.9855,
  },
  {
    id: "2",
    name: "Starbucks – Bryant Park",
    latitude: 40.7536,
    longitude: -73.9832,
  },
  {
    id: "3",
    name: "Starbucks – Herald Square",
    latitude: 40.7496,
    longitude: -73.987,
  },
  {
    id: "4",
    name: "Starbucks – Union Square",
    latitude: 40.7359,
    longitude: -73.9911,
  },
  {
    id: "5",
    name: "Starbucks – Columbus Circle",
    latitude: 40.7681,
    longitude: -73.9819,
  },
  {
    id: "6",
    name: "Starbucks – Grand Central",
    latitude: 40.7527,
    longitude: -73.9772,
  },
  {
    id: "7",
    name: "Starbucks – Wall Street",
    latitude: 40.7075,
    longitude: -74.0113,
  },
  {
    id: "8",
    name: "Starbucks – South Street Seaport",
    latitude: 40.7079,
    longitude: -74.0036,
  },
  {
    id: "9",
    name: "Starbucks – World Trade Center",
    latitude: 40.7115,
    longitude: -74.0133,
  },
  {
    id: "10",
    name: "Starbucks – Battery Park",
    latitude: 40.7033,
    longitude: -74.017,
  },
  {
    id: "11",
    name: "Starbucks – SoHo Broadway",
    latitude: 40.7233,
    longitude: -73.9994,
  },
  {
    id: "12",
    name: "Starbucks – West Village",
    latitude: 40.735,
    longitude: -74.0037,
  },
  {
    id: "13",
    name: "Starbucks – Chelsea Market",
    latitude: 40.742,
    longitude: -74.0058,
  },
  {
    id: "14",
    name: "Starbucks – Flatiron",
    latitude: 40.7411,
    longitude: -73.9897,
  },
  {
    id: "15",
    name: "Starbucks – Penn Station",
    latitude: 40.7506,
    longitude: -73.9935,
  },
  {
    id: "16",
    name: "Starbucks – Madison Square Garden",
    latitude: 40.7505,
    longitude: -73.9934,
  },
  {
    id: "17",
    name: "Starbucks – MoMA",
    latitude: 40.7614,
    longitude: -73.9776,
  },
  {
    id: "18",
    name: "Starbucks – Rockefeller Center",
    latitude: 40.7587,
    longitude: -73.9787,
  },
  {
    id: "19",
    name: "Starbucks – Lexington Ave",
    latitude: 40.757,
    longitude: -73.9718,
  },
  {
    id: "20",
    name: "Starbucks – Upper East Side 77th",
    latitude: 40.7736,
    longitude: -73.959,
  },
];
Code breakdown
- We created a TypeScript type called CoffeeShop to represent the mock data.
- We created an array of type CoffeeShop to represent the list of Starbucks.
Add the map
Now let’s replace the default app/(tabs)/index.tsx with this code:
import { SHOPS } from "@/data/shops";
import { useBottomTabBarHeight } from "@react-navigation/bottom-tabs";
import { useRef } from "react";
import { Platform, Pressable, StyleSheet, Text, View } from "react-native";
import MapView, {
  Callout,
  Marker,
  PROVIDER_DEFAULT,
  Region,
} from "react-native-maps";
import { useSafeAreaInsets } from "react-native-safe-area-context";

const MANHATTAN_REGION: Region = {
  latitude: 40.7831,
  longitude: -73.9712,
  latitudeDelta: 0.15,
  longitudeDelta: 0.15,
};

export default function HomeScreen() {
  const mapRef = useRef<MapView | null>(null);
  const insets = useSafeAreaInsets();
  const tabBarHeight = useBottomTabBarHeight();

  const recenter = () => {
    mapRef.current?.animateToRegion(MANHATTAN_REGION, 800);
  };

  return (
    <View style={styles.container}>
      <MapView
        ref={mapRef}
        style={StyleSheet.absoluteFill}
        provider={PROVIDER_DEFAULT}
        initialRegion={MANHATTAN_REGION}
      >
        {SHOPS.map((shop) => (
          <Marker
            key={shop.id}
            coordinate={{
              latitude: shop.latitude,
              longitude: shop.longitude,
            }}
            title={shop.name}
            description="Open daily"
            pinColor="green"
          >
            <Callout>
              <View style={styles.callout}>
                <Text style={styles.calloutTitle}>{shop.name}</Text>
                <Text>One of many in Manhattan ☕</Text>
              </View>
            </Callout>
          </Marker>
        ))}
      </MapView>

      <View
        pointerEvents="box-none"
        style={[
          styles.fabWrapper,
          {
            bottom: tabBarHeight + insets.bottom + 16,
          },
        ]}
      >
        <Pressable onPress={recenter} style={styles.fab}>
          <Text style={styles.fabText}>Zoom to Manhattan</Text>
        </Pressable>
      </View>
    </View>
  );
}

const styles = StyleSheet.create({
  container: { flex: 1, backgroundColor: "#fff" },
  callout: { maxWidth: 220, gap: 4 },
  calloutTitle: { fontWeight: "600", marginBottom: 2 },
  fabWrapper: {
    position: "absolute",
    left: 0,
    right: 0,
    alignItems: "center",
    zIndex: 10, // iOS + Android stacking
    ...(Platform.OS === "android" ? { elevation: 10 } : null),
  },
  fab: {
    paddingHorizontal: 16,
    paddingVertical: 12,
    backgroundColor: "#1e40af",
    borderRadius: 24,
    shadowColor: "#000",
    shadowOpacity: 0.2,
    shadowRadius: 8,
    elevation: 3,
  },
  fabText: { color: "white", fontWeight: "600" },
});
Code Breakdown
Let’s walk through what’s happening here, step by step.
Imports
We grab everything we need:
- React hooks (useRef) to remember our map.
- React Native UI (View, Text, Pressable, etc.) to build the layout and button.
- Safe area + tab bar helpers (useSafeAreaInsets, useBottomTabBarHeight) so our button floats above the nav bar and iOS home indicator.
- Map components from react-native-maps to render the map and control it.
- TypeScript type for the map so useRef knows exactly what it’s holding.
Manhattan region
A fixed object that says: “Start the map here, zoomed so all of Manhattan fits nicely.”
The latitudeDelta and longitudeDelta control the zoom level — smaller values mean closer zoom.
Map reference
The mapRef is like a magic string tied to our <MapView>. We use it as a reference to say:
“Hey map, move over here!”
Safe area & tab bar height
The insets.bottom is the padding needed for iOS home indicator areas.
The tabBarHeight is the height of the bottom nav bar.
We add both together so the button never hides under them.
Recenter function
When the button is pressed, we call:
mapRef.current?.animateToRegion(MANHATTAN_REGION, 800);This tells the map:
“Fly back to Manhattan in 0.8 seconds.”
The layout
The <MapView> fills the whole screen. While the <View style={fabWrapper}> sits on top of the map (absolute position) and holds the button.
The pointerEvents="box-none" lets you still drag the map even if you start the touch near the button’s container.
The <Pressable> is the actual blue button. When tapped it recenter to the Manhattan region.
Styles
container→ fills the screen.fabWrapper→ absolutely positions the button overlay.fab→ blue rounded button with padding and a shadow.fabText→ white bold text for the button label.
Run the app
Start the project:
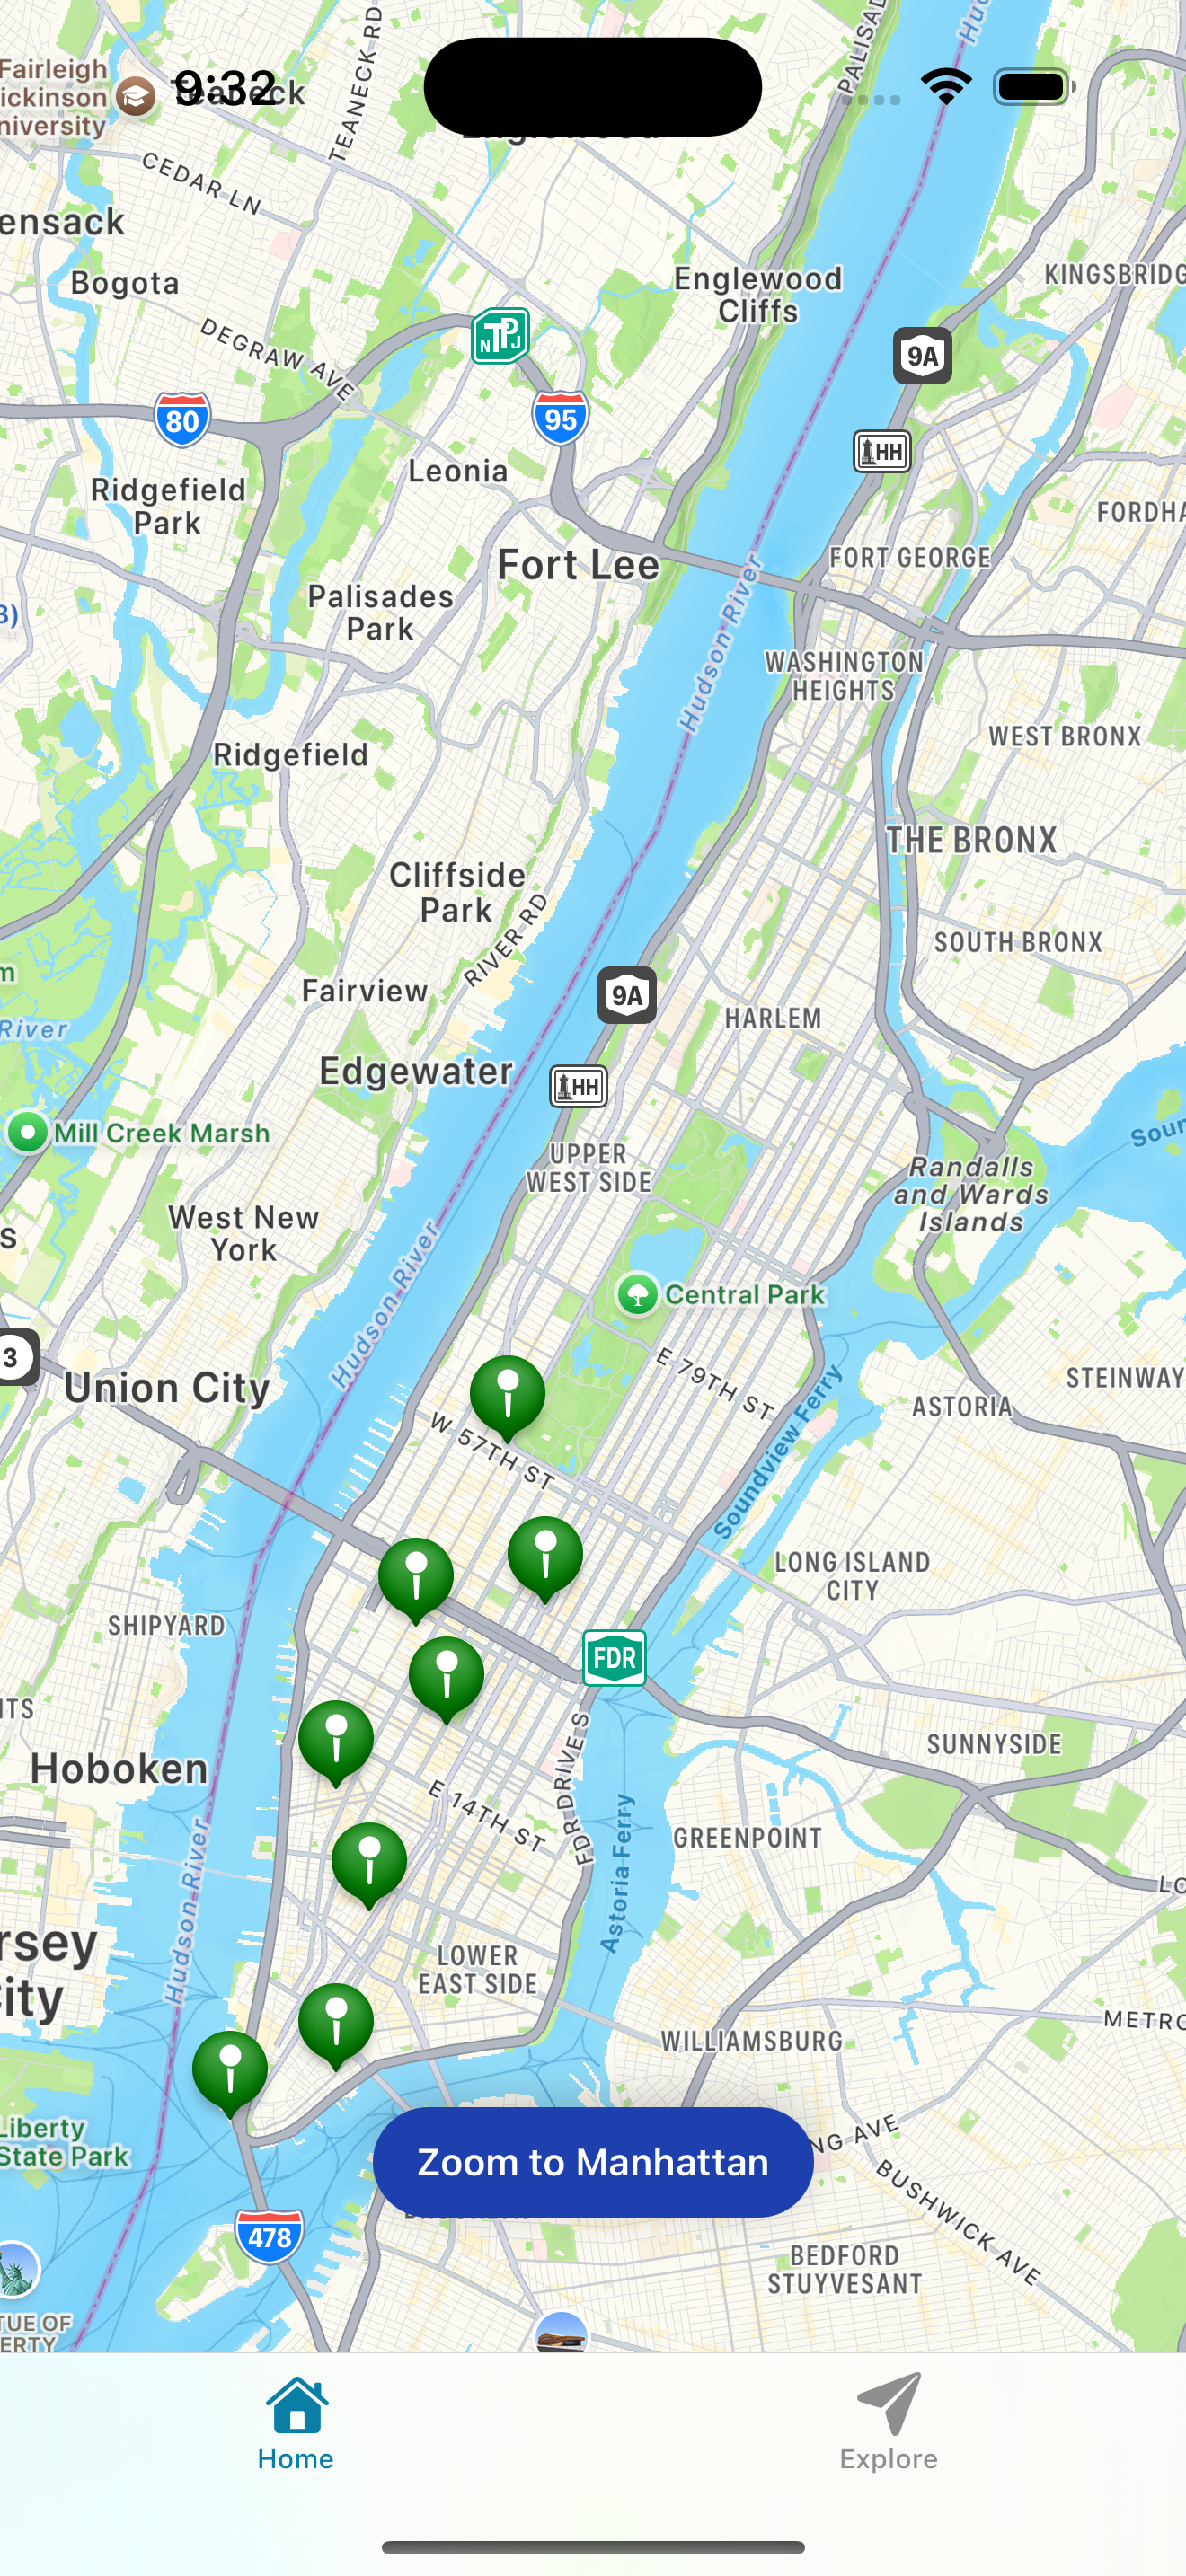
npx expo startYou should see:
- A map centered on Manhattan
- Green pins for our Starbucks locations
- Callouts when you tap a pin
- A floating button to zoom back to Manhattan
What’s next
That’s it — you’ve got an App with a Map feature! Nice work, developer 🫡
From here you could:
- Add clustering for many markers
- Use your actual location with Expo Location (
expo-location) - Fetch real Starbucks data from an API
Conclusion
Maps are one of those features that instantly make your app feel more dynamic and useful. Now you have a setup you can reuse in any project — just swap out the data, tweak the styling, and you’re ready to go.
See you in the next one, Developer. Enjoy the journey and have fun! 💙