Welcome, developers 🖖 It’s being a month since our last post, and honestly? I was so looking forward to being back!
First of all, I want to apologize for the silence in here recently. It’s been pretty busy times working on a few exciting projects at the same time. Although, I’ve finally found a window to release a new interesting post on our blog! I hope you guys enjoy it, and most importantly, I hope it contributes in any way for your learning journey.
Before I show you what I have planned for us today, and we start talking about what we love most (…coding?), I truly want to thanks everyone who follows us and has been waiting for this new post. It’s just amazing how our message can reach developers all around the world 🌏
Among all those fantastic countries, here goes a special thank you to some friends from Sweden 🇸🇪 They kindly suggested the subject of today! I’m so pleased to know I’m responsible for motivating other developers to learn new things and keep pushing forward ♡ I appreciated it, guys!
Shall we learn now an awesome JavaScript library to work with maps on web apps? It’s called Leaflet. Are you with me on this? Fantastic, it’s gonna be fun!
Grab your source of caffeine (I already have my Red Bull with me!), open your favourite code editor, and let’s get our hands dirty, developers!
Table of contents
Open Table of contents
Introduction
Leaflet is an open-source JavaScript to develop maps of any complexity. It’s a light-weight and flexible library that enables you customize maps accordingly to your project requirements or idea. It is widely used by big names such as Facebook, Pinterest, GitHub, and many others. Another great advantage, It’s mobile-friendly so you don’t have to worry about responsiveness. Seems pretty cool, doesn’t it?
Okay, I’m sold but…what about the integration with React applications? Yep, that is when React Leaflet comes into play 🔥
If you are not familiar with React, or JavaScript, no worries. It’s all good. The samples we’re gonna practice would be well explained and easy to follow. My only objective here is to cause in you the curiosity to explore and go beyond!
Let me get this straight, so we have the power of Leaflet maps and React components (and many more!) in just one place? Perfectly correct, and this place is the app we will build together by starting now 👌
Requirements
As always, the top item of the list is to have Node.js installed on our machines. If you have followed our previous posts, you can skip this step; otherwise, go ahead and install it. Once it’s done, please restart your computer and let’s go to the next step!
Create React App
Let’s start by applying the quickest approach when creating a React app:
npx create-react-app wd-map-appFor those who haven’t heard about it before, the create-react-app command is a great way to get up and running quickly without worrying or spending time with configurations. I highly recommend it, guys.
Installing Packages
Let’s install the packages we will need to build our cool map app:
yarn add react-leaflet leafletPersonally, I enjoy using Yarn over npm, they're both great so feel free to choose your favourite.
By installing those two libraries, react-leaflet and leaflet, we’ve got all we need to present and play with maps. But what about some styles?
yarn add @material-ui/coreDefinitely, Material-UI is one of my favourite design libraries to use with React. It’s based on the Material Design developed by Google in 2014. Once we get our map app finished, I encorage you to explore it and play with some examples. I suspect you will enjoy it!
Layout Design
Let’s quickly put in place a simple layout. Our goal here is not to spend time on a fancy design, but something good enough to make our app look nice.
First of all, we can remove the unnecessary files for our objective:
App.css; App.test.js; index.css; logo.svg; setupTests.js
On the index.js, remember to remove the references of the deleted files.
From the Material-UI, we will be using the AppBar component to create a top nav bar. So, copy the code below to your App.js file:
import React from "react";
import { makeStyles } from "@material-ui/core/styles";
import AppBar from "@material-ui/core/AppBar";
import Toolbar from "@material-ui/core/Toolbar";
import Typography from "@material-ui/core/Typography";

const useStyles = makeStyles((theme) => ({
  root: {
    flexGrow: 1,
  },
  menuButton: {
    marginRight: theme.spacing(2),
  },
}));

const App = () => {
  const classes = useStyles();

  return (
    <div className={classes.root}>
      <AppBar position="static">
        <Toolbar variant="dense">
          <Typography variant="h6" color="inherit">
            Welcome, developer | My React and Leaflet app
          </Typography>
        </Toolbar>
      </AppBar>
    </div>
  );
};

export default App;
Great, now let’s start our local server to visualize how the app is getting on:
yarn startYou should find a page similar to this:
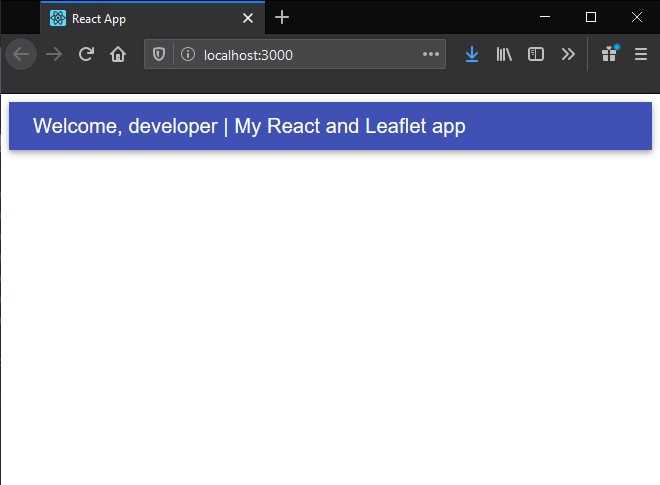
Did I tell you how fast it is to create cool objects using Material-UI? Terrific, isn’t it? Talking about this design library would be more than enough for its own post!
Building a Map
It’s the time to show what we came here for. Shall we start building some maps?
For the maps to render correctly on the app, it must contain the reference to the Leaflet CSS file. Go to the public folder on the root of the application, open the index.html file, and add the following code:
<!DOCTYPE html>
<html lang="en">
  <head>
    <meta charset="utf-8" />
    <link rel="icon" href="%PUBLIC_URL%/favicon.ico" />
    <link
      rel="stylesheet"
      href="https://unpkg.com/leaflet@1.6.0/dist/leaflet.css"
      integrity="sha512-xwE/Az9zrjBIphAcBb3F6JVqxf46+CDLwfLMHloNu6KEQCAWi6HcDUbeOfBIptF7tcCzusKFjFw2yuvEpDL9wQ=="
      crossorigin=""
    />
    <meta name="viewport" content="width=device-width, initial-scale=1" />
    <meta name="theme-color" content="#000000" />
    <meta name="description" content="welcome developer blog post" />
    <link rel="apple-touch-icon" href="%PUBLIC_URL%/logo192.png" />
    <link rel="manifest" href="%PUBLIC_URL%/manifest.json" />
    <title>My Map App</title>
  </head>

  <body>
    <noscript>You need to enable JavaScript to run this app.</noscript>
    <div id="root"></div>
  </body>
</html>
Cool, one step further. Let’s create a new folder called components into the src folder. Then, create a file in it called CustomMap.js. Copy the following code to it:
import React from "react";
import { makeStyles } from "@material-ui/core/styles";
import { Map, TileLayer } from "react-leaflet";
const useStyles = makeStyles((theme) => ({
root: {
width: "100%",
height: "100vh",
},
}));
// initial location on map
const position = [-43.5321, 172.6362];
const CustomMap = () => {
const classes = useStyles();
return (
<Map center={position} zoom={13} className={classes.root}>
<TileLayer
attribution='© <a href="http://osm.org/copyright">OpenStreetMap</a> contributors'
url="https://{s}.tile.openstreetmap.org/{z}/{x}/{y}.png"
/>
</Map>
);
};
export default CustomMap;Great news, developers. Our first Leaflet map has been created 😀 But how? No worries, let me guide you through the code highlighted above:
- First, we must import the reference to the react-leaflet library. In our case, we’re using the Map and the TitleLayer components.
- Second, when the map is rendered, it’s supposed to show a location as the start point. In my case, I chose a special place in the world. What is yours? Feel free to adjust the row number 13 as you wish, guys!
- Last but not least, the Leaflet Map component is returned and rendered by the application.
With the local server up and running, refresh your application page to see a new cool map on it:
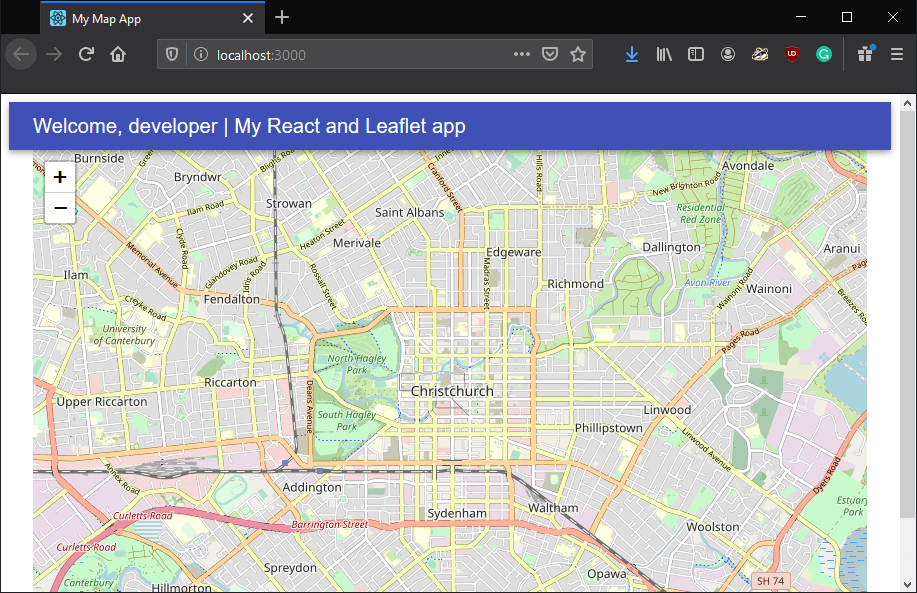
Looks nice, don’t you think? Agreed, you are totally right. What is the purpose of a map when it doesn’t give us any useful information or insights? How about we change this situation in the next section?
GeoJSON Data
When working with geographic data structures, it’s common to handle GeoJSON files. It’s based on the JavaScript Object Notation (JSON), and the purpose of representing geographical data.
It’s possible to find plenty of public datasets available on the web to play with. We aim with this post to keep things simple, so we will be only adding fixed locations to the map.
As a suggestion for a second part, we could work with GeoJSON files to dynamically populate a map. How does it sound, developers?
Adding Markers
To add markers on a map, we only need to make a simple change to our custom map component:
import React from "react";
import { makeStyles } from "@material-ui/core/styles";
import { Map, TileLayer, Marker } from "react-leaflet";
const useStyles = makeStyles((theme) => ({
root: {
width: "100%",
height: "100vh",
},
}));
// initial location on map
const position = [-43.5321, 172.6362];
// array of locations
const locations = [
[-43.531, 172.6372],
[-43.5311, 172.6392],
[-43.5321, 172.6312],
[-43.5331, 172.6332],
[-43.5341, 172.6352],
];
const CustomMap = () => {
const classes = useStyles();
return (
<Map center={position} zoom={13} className={classes.root}>
<TileLayer
attribution='© <a href="http://osm.org/copyright">OpenStreetMap</a> contributors'
url="https://{s}.tile.openstreetmap.org/{z}/{x}/{y}.png"
/>
{locations.map((item) => (
<Marker position={item}></Marker>
))}
</Map>
);
};
export default CustomMap;Above, we’ve just created an array of locations with the goal of getting as close as possible of a real-world scenario when we are requesting some API or working with text files. For each item of the array, we create a Marker component inside the main map component. The markers are always based on coordinates (latitude and longitude).
Let’s refresh our app to check if the markers can be visualized?
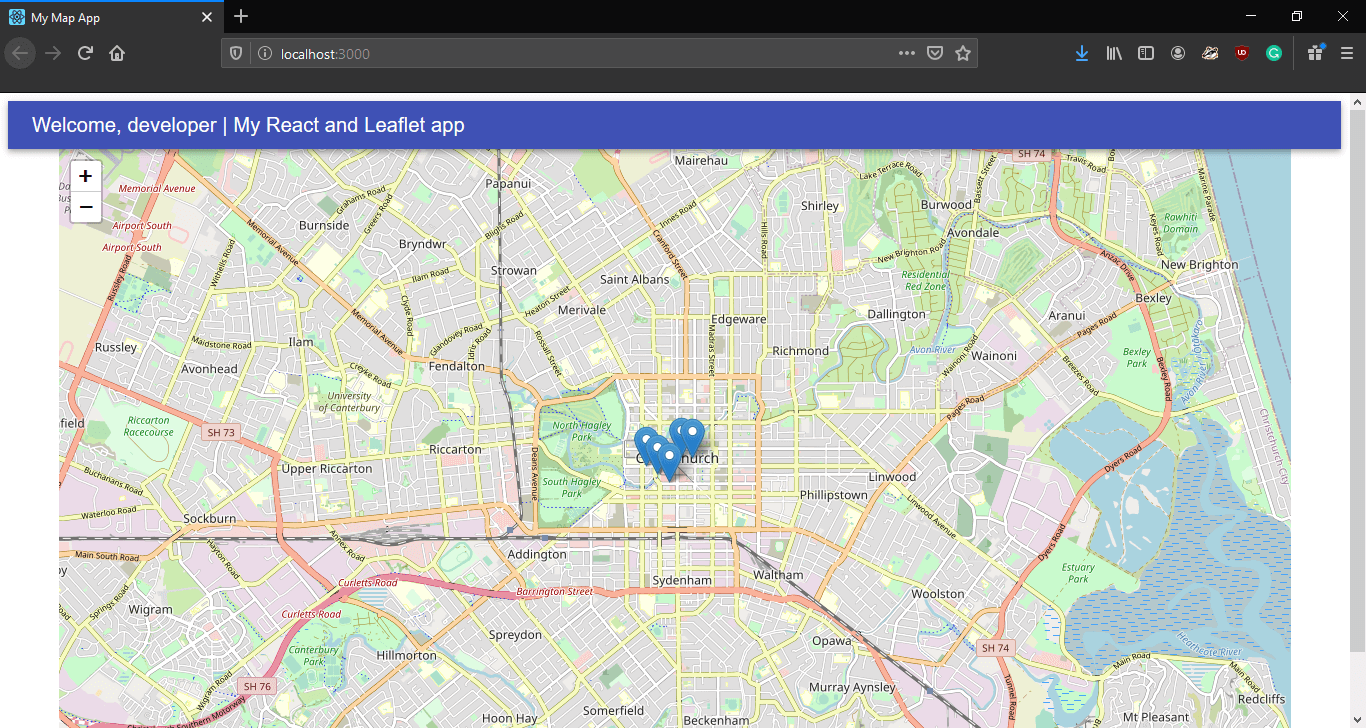
Well done, guys. It’s looking good! But it isn’t done yet, is it? What information those markers provide? Yep, nothing yet. Let’s add some data to it!
Showing Information
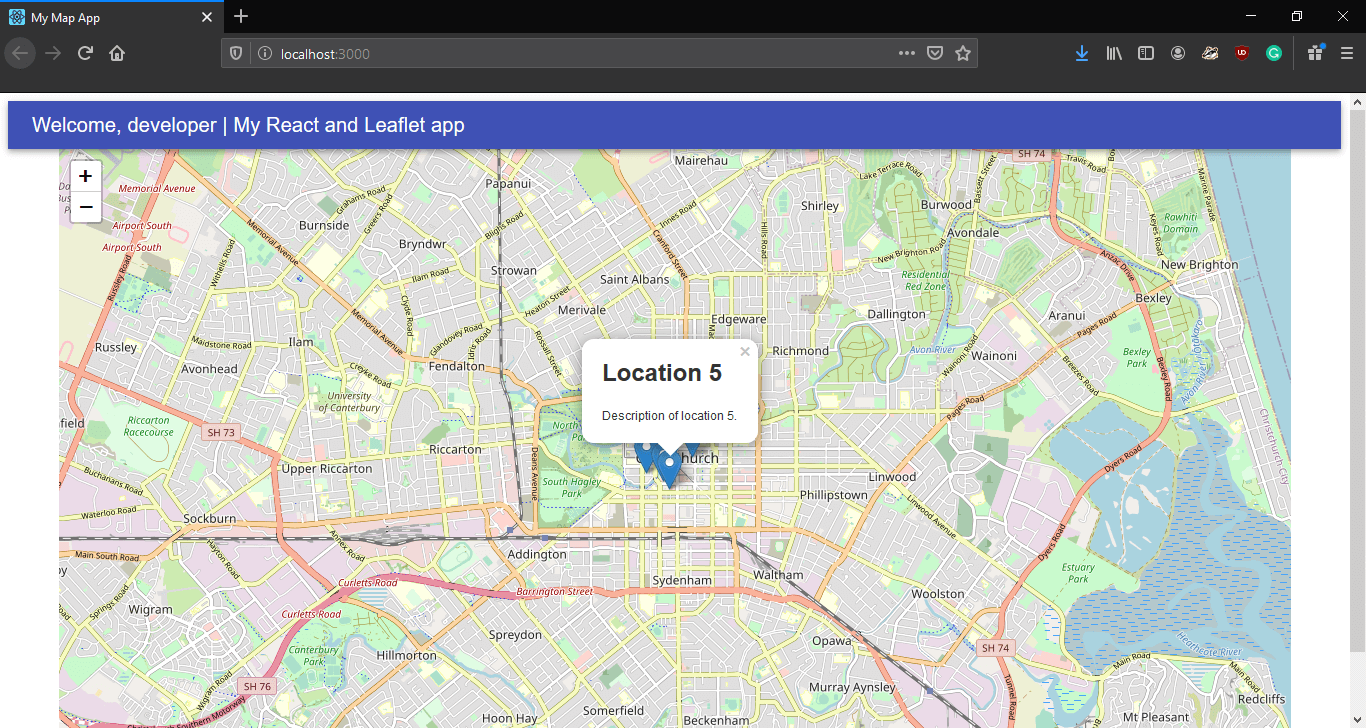
To illustrate a map marker with some information, we’re going to use a component called Popup.
I thought might be a good example of the marker shows a title and description when clicked. Sounds good?
Go back to our custom map component, and paste the following code:
import React from "react";
import { makeStyles } from "@material-ui/core/styles";
import { Map, TileLayer, Marker, Popup } from "react-leaflet";
const useStyles = makeStyles((theme) => ({
root: {
width: "100%",
height: "100vh",
},
}));
// initial location on map
const position = [-43.5321, 172.6362];
// sample locations
const locations = [
{
title: "Location 1",
description: "Description of location 1.",
coordinates: [-43.531, 172.6392],
},
{
title: "Location 2",
description: "Description of location 2.",
coordinates: [-43.532, 172.6352],
},
{
title: "Location 3",
description: "Description of location 3.",
coordinates: [-43.533, 172.6312],
},
{
title: "Location 4",
description: "Description of location 4.",
coordinates: [-43.534, 172.6342],
},
{
title: "Location 5",
description: "Description of location 5.",
coordinates: [-43.535, 172.6352],
},
];
const CustomMap = () => {
const classes = useStyles();
return (
<Map center={position} zoom={13} className={classes.root}>
<TileLayer
attribution='© <a href="http://osm.org/copyright">OpenStreetMap</a> contributors'
url="https://{s}.tile.openstreetmap.org/{z}/{x}/{y}.png"
/>
{locations.map((item) => (
<Marker position={item.coordinates}>
<Popup>
<h1>{item.title}</h1>
<p>{item.description}</p>
</Popup>
</Marker>
))}
</Map>
);
};
export default CustomMap;Now, let’s refresh the browser. Go ahead and click on a marker, a piece of simple but cool information should be shown!
That’s all for today, Ladies and gentlemen!
What’s next?
Leaflet offers many pretty cool features and possibilities when working with maps on JavaScript applications. Why don’t you go ahead and have a play with it? Also, use some time to go through the React Leaflet library examples and tutorial. It’s well worth it.
If you want to check the code we developed throughout the post, check our GitHub page.
Useful Resources
Conclusion
Thank you so much for all of you who have reached this point. I’m truly grateful ♡
I hope you had some fun building the map application. It’s always a great time!
Feel free to reach out to me on my LinkedIn profile. Let’s share some knowledge and experiences. You’re very welcome, developer!
Keep up with the hard-working, guys. Remember, it always pays off. See you in the next post!
Follow Us
The Welcome, Developer has a brand new LinkedIn page! If you enjoy our content, we would be very happy to have you as a follower! In there, we will update you about new posts, new projects, and all the cool stuff!