Welcome, developers to a new exciting post in our dev journal 🖖 I hope you all are well and healthy, and eager to learn something new today!
If you haven’t been around here before, be very welcome to our blog. You’ve been invited to explore our previous posts, hope you find a cool one that aggregates value to your learning journey.
For those who have followed our previous post series on building Power BI custom visuals, you are probably doing some awesome stuff already! Keep up the hard work, guys 💯 If you haven’t checked it yet, give it a try and build some cool visual to share on your reports!
In this new post, I’m gonna show you how we can quickly develop an API (Application Programming Interface) using Node.js and Express. We cover topics such as security, routes, middlewares, error handling, and much more.
I reckon you’ll be surprised how fantastic it is, so follow me and let’s have some fun together in this post!
Table of contents
Open Table of contents
Introduction
The plan I have for us today is to build an API that exposes the data from some pretty cool TV shows. I’ve prepared some JSON files you guys can download from this post’s GitHub page in the tv-shows-data folder. We’re gonna talk about it later on.
To build the API, we’re gonna use Express. It couldn’t make more sense as it’s the most popular Node.js web application framework. There are also amazing options out there, such as Koa (built by the same team that made Express). It can be a future post, but now, let’s focus on the chosen one.
Once our API is developed, up and running, we’ll publish it to an awesome cloud platform, ZEIT Now (I’m a big fan, I admit it!). ZEIT is built by the same team that developed Next.js, how better could it be? The main purpose of this platform is to provide crucial features such as CDN, HTTPS, CD/CI, to modern applications developed in Next.js, React, Gatsby, Vue, Angular. Haven’t explored it yet? This post’s your first chance, developer!
I’m not supposed to give spoilers about our next posts, but I’ll make an exception this time as I mentioned Next.js. You got it? 😉
Now, enough talking guys. Time to get our hands dirty!
Setting Up Environment
First of all, we must have Node.js installed on our local machine. In case you don’t have it yet, go ahead and install it here. It’s a simple and quick process (don’t forget to restart your computer). If you have followed any of my previous posts, you can skip this task.
Now, let’s create our Node.js application:
mkdir welcomedevapi
cd welcomedevapi
It’s time to add some settings to it. Run the command below and go through the default settings:
npm initNext, let’s install Express.js:
npm i expressBefore we continue, shall we perform some classic “Hello World” example so you can see the API running on your local host?
Create a new file with the same name defined as the entry point on the package.json file, in my case, index.js:
{
  "name": "welcomedevapi",
  "version": "1.0.0",
  "description": "welcome, developer api",
  "main": "index.js",
  ...
}
Now, let’s copy the following code to our index.js file:
const express = require("express");
const app = express();

const port = 3000;

app.get("/", (req, res) => res.send("Welcome, developers!"));

app.listen(port, () =>
  console.log(`Your API is running locally on http://localhost:${port}`)
);
If you missed any part of the code, be calm and relax. You’ll be fluent on it by the end of our post 👌
What we need next is to get our local server running:
node index.jsGo to your favourite browser and access http://localhost:3000. If everything went as we expect, you should be able to see the ”Welcome, developers!” message. Piece of cake, right?
Fantastic. We’ve got what we need to expose the simplest API. Our job from now on is to improve it as we go, and create a real-world class API. Challenge accepted?
Routing
In APIs, routing is a basic and, at the same time, crucial part of it. It determines how a client can interact with our API, for example, what endpoints or methods are accessible and what HTTP verbs are allowed (get, post, put, delete).
To create a route to our API, shall we start from the very begining? First of all, do you remember our index.js entry point file? Great, let’s rename it to app.js (don’t forget to also rename it on the package.json):
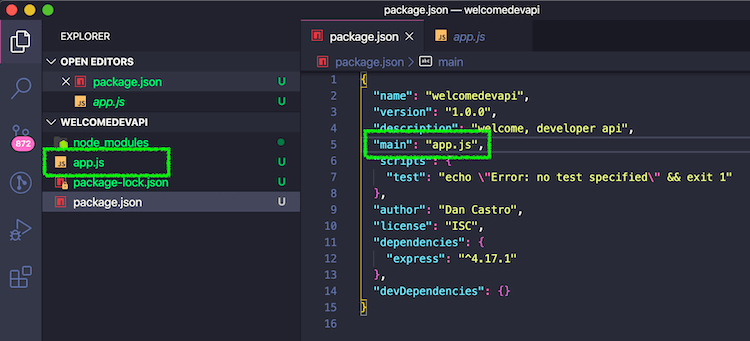
The reason for that is just to follow some Express’s standards. Why not, right? I personally believe that standards and best practices exist to be followed 😀
Have you noticed in our “Welcome, developer” previous example, we had one route already? Look at the app.get(’/‘) on row number six! Next step, let’s start building some more API routes and adding a bit of more complexity (fun, I mean!).
Back to the code, please create a new folder named api on the root of the application. Next, a new file inside of the new folder, called index.js. Leave it there for a minute.
Now we must change the app.js file, on the root of our application, to make it ready for the new structure:
const express = require("express");
const app = express();
const api = require("./api");
const compression = require("compression");

app.use(express.json());

app.use(express.urlencoded({ extended: true }));

app.use(compression());

app.use("/api", api);

const port = process.env.PORT || 3000;

app.listen(port, () =>
  console.log(`Your API is listening to http://localhost:${port}`)
);
Phew, lots of changes, huh? Agreed, but no worries, it’s all easy to understand. Basically, we’re telling the API to:
- Parse incoming client requests to JSON format (row 6)
- Parse urlencoded requests’ body (row 8)
- Compress the response body to increase performance. Before use it, we must install the compression package (row 10)
- Register our api folder to receive all client requests
- In case you’ve created an environment variable called PORT, then that’s the API port we use, otherwise, it’s the 3000 port as default.
Great, we’re on the right path. Back to the api/index.js file:
const express = require("express");
const app = express();

// routers reference
const thrillerRouter = require("./components/thriller/router");
const crimeRouter = require("./components/crime/router");
const comedyRouter = require("./components/comedy/router");
const dramaRouter = require("./components/drama/router");
const fantasyRouter = require("./components/fantasy/router");

// root route
app.get("/", function (req, res) {
  res.json({
    success: true,
    msg: "This is our Welcome, developer! API",
  });
});

// register routes
app.use("/shows/thriller", thrillerRouter);
app.use("/shows/crime", crimeRouter);
app.use("/shows/comedy", comedyRouter);
app.use("/shows/drama", dramaRouter);
app.use("/shows/fantasy", fantasyRouter);

module.exports = app;
Our goal is to enable the user to request the shows only from the genre this wants. I’ve picked some TV shows I enjoy, and classified them into different genres. The plan is to get as close as possible to a real-world scenario, using sample data.
Please note the folder structure of the routers on rows 5-9, that’s exactly what we’re going to generate as the next step. I’m using in this post the same API structure I always use on my projects. I believe it creates an application easier to be tested and maintained by grouping each routers’ components together. You’ll see what I mean shortly!
First, let’s create a new folder named components in the src folder. Next, in the new folder, a folder for each genre. Your app structure should be looking like this:

To avoid this post to become too verbose, I’m going to describe the actions to only one genre. But, we cannot forget to replicate to the others!
Let’s create a router.js file in the comedy folder:
const express = require("express");
const router = express.Router();

const controller = require("./controller");

router.get("/", controller.getShow);

router.use((req, res, next) => {
  res.status(404).json({ success: false, message: "Page not found!" });
});

module.exports = router;
Fantastic, allow me to explain to you what we just did. We’re using the Router object which is responsible for managing middlewares and routing on our API. The parameters req, res, next represent all the properties regarding the client request, the response, and the next action to be performed by the router, if any. We won’t cover everything in this post, but I highly recommend you have a look at the Express API reference page.
The next step is to develop the action to be performed by the router. Have a look at the router code, there is a reference to a controller file which is supposed to perform the getShow action (rows 4-6):
const express = require("express");

const getShow = (req, res, next) => {
  res.json({ success: true, message: "You've requested the comedy TV shows." });
};

module.exports.getShow = getShow;
As you can see, we’re not providing any real data, but only informing the user the genre requested. No worries, we will handle in the exercise.
Shall we replicate what we did to all genres? Don’t forget to adjust the genre in the JSON response message. Let’s do it, everyone. No rush, take your time. I’ll be waiting before we continue.
Time to test if we are doing a good job! So start your development server and request the API. If the output is something like this, congrats!
{
  "success": true,
  "message": "You've requested the comedy TV shows."
}
Nodemon Utility
A quick test for you, without stopping the server, go to your comedy controller, change the response message and save it. Did anything change on the browser? Yep, neither on my side. How handy would be if the changes on our code are automatically reflected in the API when developing? The solution exists and is called Nodemon!
To install Nodemon to your API, run the command:
npm install -g nodemonDo the test again, developers. Change the response message and only refresh your browser, you should see the new value. Cool, isn’t it?
Middleware
I would say middleware is one of the most important things in Express. Basically, we define a middleware by a function that has access to the three parameters we learned previously: request, response, and next. As you have probably wondered already, the options when writing middlewares are almost infinite. We could, for example, validate an authenticated user, log the time of the request, and much more.
I’d love to create a course on Express so we could cover all details about this web framework, including advanced middlewares and authentication. However, as we must keep our exercise enjoyable and easy to follow, let’s create a simple middleware together:
// simplest middleware
const express = require("express");
const app = express();

...

// simplest middleware
app.use(function (req, res, next) {
  console.log('Time:', Date.now())
  next()
})

...

module.exports = app;
If we request any API endpoint, the date and time of the request must be printed to the console:
[nodemon] starting `node app.js`
Your API is listening to http://localhost:3000
Time: 1586151055300
Security
This section is not about authentication, but how to set some HTTP headers to help to secure our online service. The Helmet does a pretty good job by applying some middlewares to our API. I’d say it does is a best practice to always include it on our Express applications.
Let’s install the package:
npm i helmetAnd add it to our app:
const express = require("express");
...

const helmet = require("helmet");
app.use(helmet());

app.use(express.json());

app.use(express.urlencoded({ extended: true}));

app.use(compression());

app.use("/api", api);

...
Security is never enough. Better safe than sorry!
Error Handling
When a user requests an endpoint that does not exist, or when the user is not authenticated, nonetheless, the API must be able to handle it. We’ll now learn how to handle errors using the default error-handling middleware function.
On the api/index.js, we must add the highlighted code:
...

app.use("/shows/fantasy", fantasyRouter);

// handler for 404 - Resource not found
app.use((req, res, next) => {
  console.log(`${new Date().toString()} => ${req.originalUrl}`);
  res.json({
    success: true,
    msg: "We think you are lost!"
  });
});

// handler for 500 - Error
app.use((err, req, res, next) => {
  console.error(err.stack);
  res.json({
    success: false,
    msg: "Something went wrong!"
  });
});

module.exports = app;
I want to get your attention to the fact that we put the 404 HTTP error code (not found) after all routes being declared. It means that if any router has been matched, then the endpoint does not exist. Next, on row 15, note the additional parameter err in the middleware. It represents an error occurred in the application, 500 HTTP internal error.
This is the basic about handling errors on APIs, it can be improved according to your requirements.
Serving Data
This’s an exciting part of our post. We’re gonna serve the client with real data about TV shows. I hope you enjoy the ones I’ve picked!
And the oscar goes to…:
Drama: Gotham
Thriller: Mr. Robot
Fantasy: Game of Thrones
Crime: Narcos
Comedy: Friends
Following the winners’ categories, let’s put each JSON data file in its respective router folder. To download the data, go to the tv-shows-data folder on the GitHub repo.
The next step is to develop the action on the controllers. Let’s do the same approach again, the code below is for one genre so we have to apply to all:
const express = require("express");
const data = require("./friends.json");

const getShow = (req, res, next) => {
  res.json({ success: true, data: data });
};

module.exports.getShow = getShow;
Yep, simple change. We only have to add the reference to the data and then send it to the client through the response object. Don’t forget to replicate to the other components.
Publishing
Time to publish our API to a cloud hosting platform, in our case, ZEIT Now.
First of all, guys. We must sign up on the ZEIT Now website. It’s free of charge plus you can use your GitHub account.
Second, let’s install the Now CLI:
npm i -g nowFrom whithin your application folder, run the command and enter your credentials (in case you are not logged):
now loginBefore we deploy our API, we must do some work! Create a new file, on the root of the application, called now.json:
{
  "version": 2,
  "builds": [
    {
      "src": "app.js",
      "use": "@now/node-server"
    }
  ],
  "routes": [
    {
      "src": "/api",
      "dest": "/app.js",
      "methods": ["GET"]
    },
    {
      "src": "/api/shows/comedy",
      "dest": "/app.js",
      "methods": ["GET"]
    },
    {
      "src": "/api/shows/fantasy",
      "dest": "/app.js",
      "methods": ["GET"]
    },
    {
      "src": "/api/shows/drama",
      "dest": "/app.js",
      "methods": ["GET"]
    },
    {
      "src": "/api/shows/thriller",
      "dest": "/app.js",
      "methods": ["GET"]
    },
    {
      "src": "/api/shows/crime",
      "dest": "/app.js",
      "methods": ["GET"]
    }
  ]
}
In this file, we inform to Now what are the routes of the API.
Now, let’s deploy it. Run the now command:
nowThat’s it, pretty straightforward, isn’t it? The API is published and ready to be validated!
Using the new URL given to you when the deployment completed, run a quick test by requesting the comedy TV shows:
GET https://welcomedevapi.now.sh/api/shows/comedyYour URL might be slightly different, but you’ve got the idea!
Express Generator
The most common approach when building an API, is to use the Express application generator. It generates an application skeleton containing routes, static files, and views. It saves quite some time. The reason I didn’t talk about it at the start of our post, was to show you how to create everything from scratch so you could learn how an API works.
npx express-generatorGive it a try and explore the structure created by this.
Keep Going
There is much more to cover on Express. Unfortunately, it’s not possible to cover everything in a single post. If you have enjoyed this, I’ll be happy to talk more about it in future posts. It’d be fantastic to talk about views, template engines, security, authentication. I truly encourage you to explore the subject we covered in here. If you have some front-end skills, then it can definitely make you a Full-Stack developer. Go ahead and improve your skills with the well-written Express API reference.
Useful Resources
Conclusion
That’s all for today, my friends. As always, it means a lot everyone who gets to the end of our coding exercises ♡ I couldn’t thank you enough!
Our goal on every single post is to stimulate your creativity, to aggregate value to your journey, and most importantly, to motivate you to push your limits further. We’re on this together, guys!
I hope this post has achieved all of your expectations, ladies and gentlemen.
Remember, only as high as you seek, can you go. So seek high and go far, developers.
Stay tuned, you’re welcome to follow me on LinkedIn. A fantastic post is being prepared for next week!
Follow Us
The Welcome, Developer has a brand new LinkedIn page! If you enjoy our content, we would be very happy to have you as a follower! In there, we will update you about new posts, new projects, and all the cool stuff!