Hey there, Developers 🖖 Welcome to the second part of our post series on building a GraphQL server! In case you have missed the first part, then I recommend you go check it out! No need to worry, we wait for you before we start 👍
It’s been more than a month since our previous post about this subject (yeah yeah, I know). Things have been pretty busy I have to say 🧑💻 Nonetheless, here we are! Hope you are still excited to learn more about GraphQL as I am!
The good thing about GraphQL is, there is a lot to learn (and it is fun!). This is actually the third post on the blog where we talk about it. In the first post, we talk about how to fetch data from a GraphQL API on a React application. In the second post (which is the first part of this series), we do the other way around and build a GraphQL server.
Let’s get started, ladies and gentlemen 🔥
Table of contents
Open Table of contents
- Just a Quick Note
- Introduction
- Agenda
- Node.js App (with TypeScript)
- Apollo Server
- Schema Type Definition
- Resolvers
- Queries
- Apollo Studio
- Data Source
- Prisma
- Why should I use it?
- How it works, exactly?
- Install & Setup
- Prisma Schema
- Prisma Studio
- Prisma + Apollo Server
- Prisma Client
- Prisma + Apollo Server (part II)
- Exploring Data
- Query Arguments
- Nested Data
- Prisma Migrations
- Next Steps
- Useful Resources
- Conclusion
- Follow Us
Just a Quick Note
Developers, I always want to provide you with a rich and complete experience when exploring any subject. However, I also keep in mind that the journey cannot be overwhelming. We want to learn and have fun at the same time, don’t we?
For this reason, I have decided to split this second part into two new posts (this one + one more). Therefore, we will have a third part coming soon. It doesn’t affect our today’s journey in any way, because each part of the series is self-contained. The exercise we will do together in the following chapters starts and ends today!
What I moved to the third part, are the advanced concepts of GraphQL such as mutations, subscriptions, and a discussion about some best practices.
Introduction
We’re going to start with a whole new application in this second part. However, some basic concepts (or environment setup) won’t be explained again so we can have more time to learn more cool stuff. Therefore, for those new to GraphQL and Apollo, I suggest you to step back just a little and go through the first post.
Last time, we have used a JSON file to mock the data. This time, what I have actually prepared for us is much more exciting! Shall we consume data from a real database? My goal is that we can learn from a scenario as close as possible to the wild out there 💪
Alrighty, code editor and coffee ready? Time to jump right in!
Agenda
As also presented in the previous post, here is the agenda for today:
- Part Two (today)
- GraphQL Query Arguments
- Prisma
- Install & Setup
- Client
- Migrations
- Prisma Studio
- Part Three
- GraphQL Mutations
- GraphQL Subscriptions
- GraphQL Best Practices
Node.js App (with TypeScript)
First step, create a new Node.js application:
mkdir my-graphql-server
cd my-graphql-server
npm init -y
What about TypeScript? Shall we? Feel free to configure your TypeScript configuration according to your preferences.
tsc --initAnd then, add ts-node so we can run typescript files directly, without the need for precompilation using tsc:
npm install ts-node @types/node --save-devNext, add the following configuration to the tsconfig.json file:
{
  "compilerOptions": {
    "sourceMap": true,
    "outDir": "dist",
    "strict": true,
    "lib": ["esnext"],
    "esModuleInterop": true,
    "noImplicitAny": false
  }
}
All good? Done ✅
Apollo Server
Remember how we implemented the Apollo Server in our application, on the previous part? We are going to do it one more time, from scratch again. As they always say, the key to learning is practice!
npm install apollo-server graphqlCool, packages installed. At the root level of the application, create a new folder named src, then a new file to be the entry point of the API:
mkdir src
cd src
touch index.ts
Next, let’s write some code so we can get the server up and running. On index.ts:
import { ApolloServer, gql } from "apollo-server";

// define the schema type definition
const typeDefs = gql``;

// create the resolvers
const resolvers = {};

// define the Apollo Server instance
const server = new ApolloServer({ typeDefs, resolvers });

// The `listen` method launches a web server.
server.listen().then(({ url }) => {
  console.log(`GraphQL server running at ${url}`);
});
For those who have joined us on our first post, or are already familiar with Apollo Server, there is nothing new until this point, right? Above there is the simplest structure of a GraphQL server. Hang on, it won’t run yet.
Can you guess what is missing? Yep, we must now define the schema type definition, the queries, the resolvers…no worries, one step at a time!
Schema Type Definition
The schema is the blueprint for our data graph, it’s like a contract between the server and the client. It defines what properties and data types are included, which means, what types of data a client can read and write. A cool thing about schemas is that they are strongly typed (correct, same as TypeScript!).
You guys remember in the previous post we talked about the GraphQL Schema Definition Language (SDL)? Yep, that’s the language used by GraphQL to define the schema. It gives the ability to add comments to the schema definition using strings!
When defining a schema, we must put it inside a gql function. This function basically is responsible for parsing a GraphQL query to a standard GraphQL AST, which can be used by any GraphQL client.
For the exercise of today, I have prepared some fun data for us! You guys will see what I’m talking about when we get to the Data Source section 😎
Enough talking, let’s build our GraphQL schema! In the src folder, create a new folder called graphql. Then, create a new file schema.ts as following:
import { gql, makeExecutableSchema } from "apollo-server";

const typeDefs = gql`
  # This "Company" type defines the queryable fields for every company in our data source.
  type Company {
    id: Int!
    name: String!
    description: String
    branches: [Branch]
  }

  # This "Branch" type defines the queryable fields for every branch in our data source.
  type Branch {
    id: Int!
    title: String!
    city: String
    country: String
    company: Company!
    employees: [Employee]
  }

  # This "Employee" type defines the queryable fields for every employee in our data source.
  type Employee {
    id: Int!
    firstName: String!
    lastName: String!
    role: String
    branch: Branch!
    company: Company!
  }

  type Query {
    companies: [Company]
    branches: [Branch]
    employees: [Employee]
  }
`;

const resolvers = {};

const schemaDef = makeExecutableSchema({
  typeDefs,
  resolvers,
});

export default schemaDef;
Cool, object types done! In this post, we have all the object types being defined on the same file (schema.ts). However, modularizing your GraphQL schema code in different files can make your life easier when maintaining projects with plenty of types.
Guys, please have a look at the new type we added above, called Query (row 29). The Query type is special and has the purpose of listing all of the available queries that clients can execute, along with the return type for each.
As you can see, the schema represents the business entities that are handled by the API. Quite similar to defining a type or interface in TypeScript, right? Also, notice the required fields (e.g., String!) and the relationships among those types!
There is a bunch of data types that can be used when defining GraphQL schemas. They cover most scenarios, however, if you need to define your own type, GraphQL allows it with custom scalar types. Another interesting thing when managing schemas is the Directive. I recommend you to have a look at it, guys! I’m not demonstrating it in this post just because we still got a lot to talk about 👍
Moving on to the next topic, folks!
Resolvers
Resolvers has quite an important role in the game - informing GraphQL how the data model is populated 👌 Those guys fetch the data from a data source, such as databases, APIs, or files, and assign it to your data graph. Awesome, got it! But what exactly are they? Well…functions! That’s it!
Let me show you a quick example so you can understand what I mean:
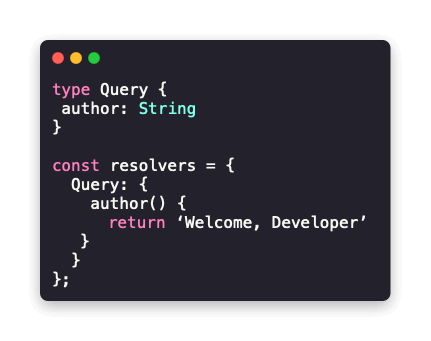
Could you notice the resolvers populating the author field through a function with same name? That’s what I’m talking about, guys! Oh by the way, see that JavaScript object named resolvers? That’s called the resolver map.
No worries, as we create our own resolvers, we will learn more (quantity) and more complex examples. In the next chapters, before we dive into real data sources, I want us to explore some GraphQL queries!
Queries
Queries are defined in the resolver map. The logic within the query is what will determine how, and from where, the schema fields are then populated.
The thing is, now that we have defined our schema, shall we build some queries that provide mock data? As I said earlier, we will be using real data today. Although, I think we could practice right away and then refactor our code a bit later on to starting reading data from a database! Are you with me on this one? Let’s get to work, developers!
First things first, we must produce some mocked data so we can provide it through the queries. Let’s create a new folder called data below src, then a file that represents each object type.
On company.ts:
[
  {
    id: 123,
    name: "Welcome, Developer Enterprise",
    description: "Just a data example!",
  },
];
On branch.ts:
[
  {
    id: 456,
    title: "New Zealand Branch",
    city: "Christchurch",
    country: "New Zealand",
    companyID: 123,
  },
];
On employee.ts:
[
  {
    id: 789,
    firstName: "Dan",
    lastName: "Castro",
    role: "Developer",
    branchID: 456,
  },
];
Nice one, guys! Time to query this data! Remember the resolvers we have just talked about? That’s the place to put the query logic!
Back to our schema file, add the highlighted code to it:
import { gql, makeExecutableSchema } from 'apollo-server';

// import mocked data
const companies from '../data/company';
const branches from '../data/branch';
const employees from '../data/employee';

const typeDefs = gql`
  # This "Company" type defines the queryable fields for every company in our data source.
  type Company {
    id: Int!
    name: String!
    description: String
    branches: [Branch]
  }

  # This "Branch" type defines the queryable fields for every branch in our data source.
  type Branch {
    id: Int!
    title: String!
    city: String
    country: String
    company: Company!
    employees: [Employee]
  }

  # This "Employee" type defines the queryable fields for every employee in our data source.
  type Employee {
    id: Int!
    firstName: String!
    lastName: String!
    role: String
    branch: Branch!
    company: Company!
  }

  type Query {
    companies: [Company]
    branches: [Branch]
    employees: [Employee]
  }
`;

const resolvers = {
  Query: {
    companies: () => companies,
    branches: () => branches,
    employees: () => employees,
  },
};

const schemaDef = makeExecutableSchema({
  typeDefs,
  resolvers,
});

export default schemaDef;
Piece of cake, huh? On the resolver map, we defined the logic for the available queries (companies, branches, employees). Nothing fancy at this point!
Shall we test it, developers? Hold on…first, we must apply a couple of tiny changes to the entry point file (index.ts):
import { ApolloServer } from "apollo-server";

// import schema definition
import schema from "./graphql/schema";

// define the Apollo Server instance
const server = new ApolloServer({ schema });

// The `listen` method launches a web server.
server.listen().then(({ url }) => {
  console.log(`GraphQL server running at ${url}`);
});
Let’s run the command on the terminal to open the:
npx ts-node src/index.tsAwesome! All good, developers? Hope you haven’t got any errors 🤞
Now open the localhost URL, printed to the console, on the browser. You should be able to see the GraphQL Playground. Feel free to play with the queries and explore our data graph! No doubts our queries are (very) simple, but remember the point: one step at time!
Here’s an example of a query, try it out on your running playground instance, guys:
{
  companies {
    id
    name
    description
  }
}
Well done! We’re getting there 🔥
Apollo Studio
The playground works pretty well, don’t you agree? It does the job of providing a quick and easy exploration of our data and schema! But here are some good news, the GraphQL toolbox has even cooler options! Have you guys heard about Apollo Studio before?
It is a fantastic platform built by the Apollo team:
“Apollo Studio is a cloud platform that helps you build, validate, and secure your organization’s data graph.”
What about we have a break from our exercise for just a bit? Maybe grab a coffee (or second coffee), and have a go with Apollo Studio? The setup is simple and well documented 👍
And the cool thing is, you can even explore your local running instance directly from the cloud platform! How handy is that, developers?
Let me know if you need a hand with it in case you face any issues, I’m more than happy to help ✌️
Data Source
Guys, I’ve prepared a data source for us to use today. For those who are fans of The Office (as I am!), I guess you guys are gonna enjoy it!
The data source is a SQLite database, containing a schema exactly like the one we defined previously. Therefore, we have in there companies, branches, and employees’ data.
We could have populated the data source together, but as this isn’t the focus of this post, I’ve decided to save us some time. Please, go to this post’s GitHub repo, and download the weldev.db file from the src/data directory. Save it on the same location (data folder) in your application.
There are plenty of tools out there that we can use to explore a SQLite database file. I personally like the DB Browser for SQLite. However, to be honest with you, do not worry about it right now. We’re going to explore our data source in a different way later on.
In the next section, I want to talk to you about a fantastic ORM (object-relational mapping) tool!
Prisma
Now we’ve got to an exciting part of our today’s journey, guys 😀
Prisma is an open-source next-generation ORM (object-relational mapping). The primary goal of it is to make developers more productive when working on applications that query and manipulate databases. And guys believe me, it does! By providing type-safe database queries and auto-completion on code editors, it’s quite straightforward to get up to speed.
In the following chapters, I’m going to introduce more details about Prisma and its features. Surely, it deserves its own post! Although, the goal of today is that you will be able to do the setup, build your schema and data model, and query your own database 👍
If you’re using Visual Studio Code as your code editor, I suggest you take the time to install the Prisma extension. It adds syntax highlighting, formatting, jump-to-definition, and linting for Prisma Schema files.
We’ll be covering the most recent version (at the time of this post) of Prisma, which is the 2.0 (aka Prisma 2).
Why should I use it?
There are a few motivations to start using Prisma as your ORM solution. What I personally enjoy about it, is the type-safe database queries that make it easy and fast to query your data, the handy migration system, and the easy-to-use data explorer tool. Last not least, the Prisma schema file is very intuitive to configure, its syntax is heavily inspired by GraphQL SDL.
To give you just a feeling about how cool is to query data with the Prisma API, have a look at this simple example:
async function main() {
  const allUsers = await prisma.user.findMany();
}
Translating to T-SQL, this is the same as a SELECT * FROM USER query. Cool, isn’t it?
At the time of this post, Prisma supports JavaScript, TypeScript, Go (early access) as programming languages, and MySQL, PostgreSQL, SQLite, MS SQL Server (preview feature) as databases.
How it works, exactly?
We start by creating a Prisma schema file, where we will define the data source, the client (generator), and the application models. When we install the Prisma client npm package, a command is invoked. This command reads your schema file and generates the Prisma client code.
Once the Prisma client is generated, we can send queries to the database through an API. To keep your database schema in sync with your Prisma schema, a tool called Prisma Migrate is used.
That’s the explanation in a nutshell, obviously, there is much more to learn and explore on Prisma.
Shall we implement it together, guys?
Install & Setup
To install the Prisma CLI, run the following command on your terminal:
npm install prisma --save-devTo validate the step above, run the npx command:
npx prismaNo errors? Good. Let’s then initialize Prisma in our application:
npx prisma initThe command above creates a new folder called prisma on the root level of the application. This new directory contains a file called schema.prisma. Also, at the root level of the application, a .env file is created. Putting in simple words, the schema.prisma represents our schema file and the .env file contains any database environment settings (i.e., connection string).
Now, let’s change the schema accordingly our exercise scenario (I apologize for the missing style on the Prisma code)
datasource db {
  provider = "sqlite"
  url = "file:../src/data/weldev.db"
}

generator client {
  provider = "prisma-client-js"
}
Please, note the relative path on row number three. So far so good, right?
The initial setup is in place. Next, we must describe the data model entities!
Prisma Schema
Remember that we already did this earlier today, on the src/graphql/schema.ts file? Let’s move it to the new Prisma schema file (with a couple of changes)?
datasource db {
  provider = "sqlite"
  url = "file:../src/data/weldev.db"
}

generator client {
  provider = "prisma-client-js"
}

model Company {
  id Int @default(autoincrement()) @id
  name String
  description String?
  branches Branch[]
}

model Branch {
  id Int @default(autoincrement()) @id
  title String
  city String?
  country String
  company Company @relation(fields: [companyId], references: [id])
  companyId Int
  employees Employee[]
}

model Employee {
  id Int @default(autoincrement()) @id
  firstName String
  lastName String
  role String?
  branch Branch @relation(fields: [branchId], references: [id])
  branchId Int
}
Not many changes, but it does is important to mention:
- Instead of types, now we have models
- Instead of ! for required fields, now it’s default
- For optional fields, it requires the ? symbol
- For IDs, it enables the decoration @id
- The relationships are now informed through the decoration @relation
Those are the major differences I’d say. Do not delete the graphql directory yet.
Great! Prisma is installed, setup is done, and the schema is configured. We want to see some data, don’t we?
Prisma Studio
Prisma Studio is a visual editor for the data in the database. It’s an amazing tool where we can query, modify, delete, and insert new data. With the bonus of a beautiful UI 👌
You’ll agree with me in a sec! Let’s run the following:
npx prisma studioThe command above starts a local instance of Prisma Studio. Open the URL on your browser and start exploring your data!
Prisma also offers the studio platform as a desktop app that you can download for Windows, macOS, and Linux. The UI is the same as the web version.
If everything went as expected, you are now navigating through our The Office database (that’s what she said) 👏 No rush, take the time to explore the data, play with the studio platform, and understand what we have defined on the schema file.
Guys, we’re getting there! Nice work!
Next, we will learn how to integrate Prisma with Apollo GraphQL 💯 Good time for a coffee break, developer!
Prisma + Apollo Server
Prisma integrates smoothly with Apollo GraphQL. We can use Prisma inside the GraphQL resolvers to query the database. Here’s an image, from the Prisma official documentation, that illustrates this integration:

Guys, let’s take one step back and talk about a key component that is missing in our puzzle - it’s called the Prisma Client. Without it, no integration between Prisma and Apollo can be made! Once we have it properly installed and generated, we go back to GraphQL.
Prisma Client
The Prisma Client is an auto-generated and type-safe query builder, for Node.js and TypeScript, that’s tailored to our data. When it is installed, it automatically runs a command (prisma generate) which generates by default the Prisma Client into the node_modules/@prisma/client directory. The output directory can be customized.
The client is generated based on the schema file and is unique to the project where it’s been installed.
It provides a rich collection of API methods, that gives us the ability to query and manipulate a database (from CRUD to logging middlewares).
Let’s install the Prisma Client on our GraphQL API, developers:
npm install @prisma/clientThe client code only changes when the schema file changes followed by a migration command. However, if you need to manually update your client code after a schema file change, run the following command:
npx prisma generateNow, go to your client output folder (node_modules/.prisma/client) and have a look at the generated code. Just so you can understand, the Prisma Client generated on npm_modules/@prisma/client references the code generated on npm_modules/.prisma/client.
The Prisma documentation provides the full list of methods available through the Prisma Client. We’ll explore just a few of them here, feel free to dive on a deeper level tough.
Nice one, my friends! Shall we now go back to our GraphQL server and setup the integration?
Prisma + Apollo Server (part II)
Back to our GraphQL schema file, we must adjust the resolvers so we start querying the database using Prisma:
import { gql, makeExecutableSchema } from "apollo-server";
import { PrismaClient } from "@prisma/client";

const prisma = new PrismaClient();

const typeDefs = gql`
  # This "Company" type defines the queryable fields for every company in our data source.
  type Company {
    id: Int!
    name: String!
    description: String
    branches: [Branch]
  }

  # This "Branch" type defines the queryable fields for every branch in our data source.
  type Branch {
    id: Int!
    title: String!
    city: String
    country: String
    company: Company!
    employees: [Employee]
  }

  # This "Employee" type defines the queryable fields for every employee in our data source.
  type Employee {
    id: Int!
    firstName: String!
    lastName: String!
    role: String
    branch: Branch!
    company: Company!
  }

  type Query {
    companies: [Company]
    branches: [Branch]
    employees: [Employee]
  }
`;

const resolvers = {
  Query: {
    companies: () => prisma.company.findMany(),
    branches: () => prisma.branch.findMany(),
    employees: () => prisma.employee.findMany(),
  },
};

const schemaDef = makeExecutableSchema({
  typeDefs,
  resolvers,
});

export default schemaDef;
Piece of cake, huh? Is it still working? Let’s run our server and check it out:
npx ts-node src/index.tsOpen the localhost URL printed on your console, and run the query below:
{
  companies {
    id
    name
  }
}
Do you see the data on the right-side of the GraphQL Playground? So do I ✔️
Congrats, developers! We are using Prisma to query a database on a GraphQL API. How amazing is that? This is something, guys!
To have some fun, what about we make the queries a little more complex? Using arguments, and returning nested data?
Exploring Data
Query Arguments
We do not want to return all the table data from the database every time if the user is querying just a single ID, right? Let’s add arguments to our GraphQL queries:
import { PrismaClient } from '@prisma/client';
import { gql, makeExecutableSchema } from 'apollo-server';

const prisma = new PrismaClient();

const typeDefs = gql`
  ...

  type Query {
    ...

    company(id: Int!): Company
  }
`;

const resolvers = {
  Query: {
    ...

    company: (_parent: any, args: any) =>
      prisma.company.findUnique({
        where: { id: args.id },
      }),
  },
};

const schemaDef = makeExecutableSchema({
  typeDefs,
  resolvers,
});

export default schemaDef;
Above, on the GraphQL schema definition, we created a new query called company that accepts a required argument named id. On the resolvers, we added the logic for the new query.
Note the new Prisma method we’re using to get a unique record on the row number 21.
Time to validate our new query, guys! On the terminal:
npx ts-node src/index.tsOn your instance of the GraphQL Playground (remember to inform the id variable on the Query Variables section):
query ($id: Int!) {
  company(id: $id) {
    id
    name
    branches {
      id
    }
  }
}
I’m using a query on the company table that filters the data by id, to illustrate how to create GraphQL queries with arguments. I won’t create more queries for the other tables to save us some time. I recommend you spend some time creating them by yourself for learning purposes.
Cool, we have learned how to use arguments on GraphQL queries, and filters on Prisma queries. What about showing the nested data, through the table relationships? Running the query below, can you see the Branches data?
{
  companies {
    id
    name
    branches {
      id
      title
      city
      country
    }
  }
}
Neither can I, guys. You know why? Because we haven’t told Prisma to include the related data on our query result. No worries, I show you how!
Nested Data
When we want to present related data through the result of a Prisma query, we must inform it, as following:
...

const resolvers = {
  Query: {
    companies: () => prisma.company.findMany({ include: { branches: true } }),
    ...
  },
};

...

export default schemaDef;
Not kidding, that’s only it! Re-run the query, guys. Easy, right? 👍
Prisma Migrations
Before we call it a day (or night for some of you), I want to introduce an important concept in Prisma called Prisma Migrate. Its purpose is to keep all in sync, your database schema, and your Prisma schema, and maintain existing data in your database.
When the Prisma CLI command (prisma migrate) runs, a SQL file is generated containing the changes performed by the migration process. As we change the schema (either side) and run the migration to sync, a history of SQL files is kept with the purpose of providing a story of the changes to your data model.
The best way to understand it is to actually do it, isn’t it? Let’s do it together then, developers!
First, a change to our Prisma schema. Adding a new field called founder to the Company model:
datasource db {
  provider = "sqlite"
  url = "file:../src/data/weldev.db"
}

generator client {
  provider = "prisma-client-js"
}

model Company {
  id Int @default(autoincrement()) @id
  name String
  description String?
  founder String?
  branches Branch[]
}

model Branch {
  id Int @default(autoincrement()) @id
  title String
  city String?
  country String
  company Company @relation(fields: [companyId], references: [id])
  companyId Int
  employees Employee[]
}

model Employee {
  id Int @default(autoincrement()) @id
  firstName String
  lastName String
  role String?
  branch Branch @relation(fields: [branchId], references: [id])
  branchId Int
}
Second, run the Prisma migration command:
npx prisma migrate dev --name founderA limitation of running the migration on a development environment (dev) is data loss when resetting the database. For the purpose of this exercise, it won’t matter much. We can use the studio platform to create data. The only goal is to demonstrate the Prisma Migrate.
Once you run the Prisma CLI command above, note a new folder called migrations created in the prisma directory. It contains the SQL script executed on the database side to sync the schema changes.
Let’s run the Prisma Studio to ensure we do have the founder field on the Company table?
npx prisma studioAll done? Nice one!
Next Steps
That’s all for today, folks! Did you guys enjoy the post? I really hope so 👍
The complete code is available on the Welcome, Developer GitHub repository 💾
Guys, I’m already currently writing the third and last part (I promise) of our series about GraphQL servers. It will be released soon. Stay tuned!
For the unstoppable ones (respect!), what about you guys use what we have learned on the post about fetching data from a GraphQL API, to create a client application that consumes the API we just built? Sound like an exciting challenge?
I’d love to see your work, developer! If you feel like it, share the link of your git repository in the comments below ✌️ Questions are more than welcome as well!
Useful Resources
- Today’s Code on GitHub
- Building a GraphQL API with Apollo Server and Node.js | Part One
- Apollo GraphQL Odyssey
- Awesome GraphQL
- Prisma
- Prisma + Apollo
- Apollo Server
Conclusion
Mission accomplished, developers! Now we know a little more about GraphQL 🤘 Someday, with a bit of effort, we are gonna get really good at it!
I truly appreciate you investing your time to go through today’s journey! I wish you had a good time, my friends 👽
Your feedback is very welcome, and also very important, for me to know how I can improve our gathering place and make the experience always better 🖖
Keep up with the hard work, guys! As Arnold Schwarzenegger said:
The wolf on the hill is not as hungry as the wolf climbing the hill.
Let’s always be that wolf, developers! See you in the next post, ladies and gentlemen!
Follow Us
The Welcome, Developer has a brand new LinkedIn page! If you enjoy our content, we would be very happy to have you as a follower! In there, we will update you about new posts, new projects, and all the cool stuff!